Install Vault-Connect
Vault-Connect is installed on the MID Server and executed into its runtime.
Once installation is done it can be configured to support a wide variety of credentials
Add Vault-Connect to MID Server
Vault-Connect is provided as a uber-jar file.
You have to create a JAR file entry from the Mid Server > JAR Files menu of ServiceNow 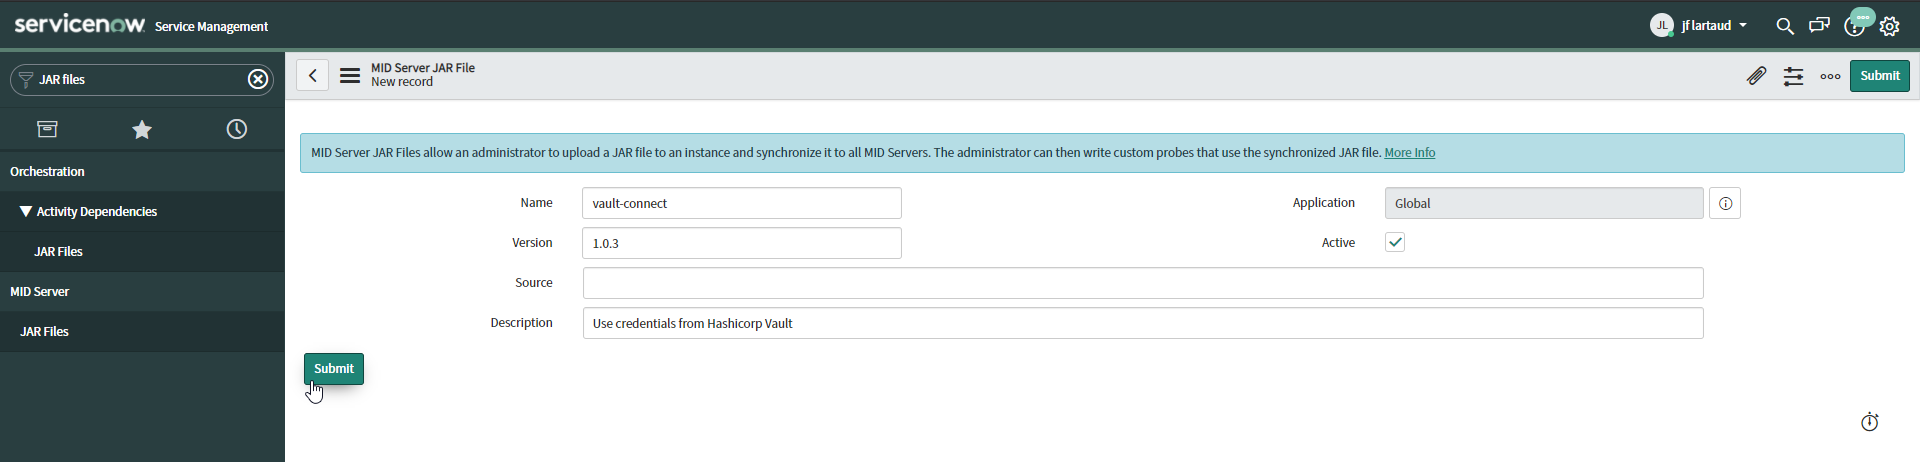
Then the JAR file can be uploaded 
After a few minutes you can see the JAR downloaded into your MID Server (into the $MID_HOME/agent/extlib directory)
Add the Trustore
The trustore should contain the Certificate Authority that generates your Vault’s certificate. It must be in PKCS#12 format.
Please consult this documentation to generate it.
If the Mid Server’s cacerts file already contains your Certificate Authority. It is located in $MID_HOME/agent/jre/lib/security directory
Otherwise, you can copy it into the $HOME/agent/keystore directory.
Add the Keystore
The keystore should contain the MID server’s certificate to call Vault with mutual TLS. It must be in PKCS#12 format.
Please consult this documentation to generate it.
The keystore can be added into the $HOME/agent/keystore directory.
Add Role ID and Secret ID
Do you remember the role-id and secret-id generated from Vault ? It’s time to use them.
To follow Hashicorp Vault guidelines, the best practice is to separate the role-id and the secret-id configurations.
- role-id will be configured into the ServiceNow MID Server properties
- secret-id will be configured into the MID Server config.xml file as a secured property
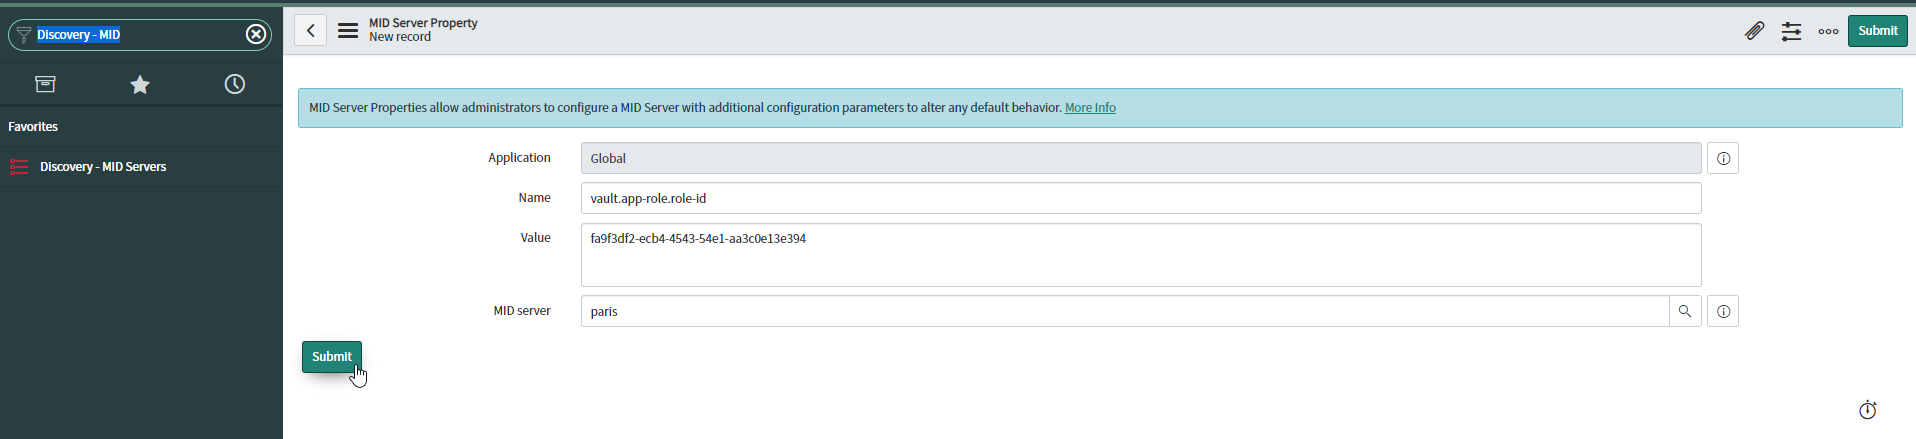
Set the Role ID
From the Discovery > Mid Server menu (view Discovery View), you can add properties into the Properties tab by clicking on New
Add the vault.app-role.role-id property with the right value
Set the Secret ID
Into the config.xml file, located into the $MID_HOME/agent directory, add a property (change the value by your own) :
<parameter name="vault.app-role.secret-id" secure="true" value="c5515458-9824-401a-9041-66a0ab30965b"/>
As decribed into the ServiceNow documentation, encryption will be done by setting the secure="true" attribute and after restarting the MID Server.
So restart the MID Server and check the parameter has been encrypted successfully.
Configure Vault-Connect
Vault-Connect uses a properties file to configure the mapping between ServiceNow and Hashicorp Vault.
Vault-Connect has been designed to be highly configurable and can answer to all the major needs.
Here is the minimal configuration file to start with our use case (Active Directory password rotation) This file has to be copied into the $HOME/agent/properties directory
vault.uri=https://my-company.com:8200
vault.ssl.key-store=file:D:\\mid-server\\agent\\keystore\\mid-server.jks
vault.ssl.key-store-password=changeit
vault.ssl.trust-store=file:D:\\mid-server\\agent\\keystore\\company_ca.jks
vault.ssl.trust-store-password=changeit
vault.authentication=APPROLE

# vault app-role configuration
vault.app-role.app-role-path=approle
vault.app-role.role-id=snc:vault.app-role.role-id
vault.app-role.secret-id=snc:vault.app-role.secret-id

# log configuration
log.file-handler.pattern=logs/vault-connect.log
log.file-handler.append=true
log.file-handler.limit=10000000
log.file-handler.count=10
log.override=true
log.level=FINEST
log.format=%1$tY-%1$tm-%1$td %1$tH:%1$tM:%1$tS.%1$tL %4$-6s %7$s %5$s%6$s%n

# license configuration
license.keystore.file=
license.keystore.password=
license.value=file:\\mid-server\\agent\\properties\\license_client.txt
license.key=client1234
Please consult this documentation for details on the configurations.